Before starting to build the bunk bed for our Airstream Sport 22FB, I wanted to make a 3D model so we could really visualize how it would look and so I could be sure to get all the measurements correct. I didn’t have 3D modeling skills, so step 1 was to learn how to use Sketchup.
As it turns out, Sketchup is a pretty easy tool to the learn. I followed a multi-part tutorial about how to model a shed in Sketchup and afterward I was feeling pretty confident to start modeling our bed.
Design Features
I first needed a basic model of the inside of the Airstream. To measure the curvature of the Airstream shell, I used a level to secure a board vertically about a foot from the inside wall of the trailer, and then measured the distance to the wall at 6 inch height increments.
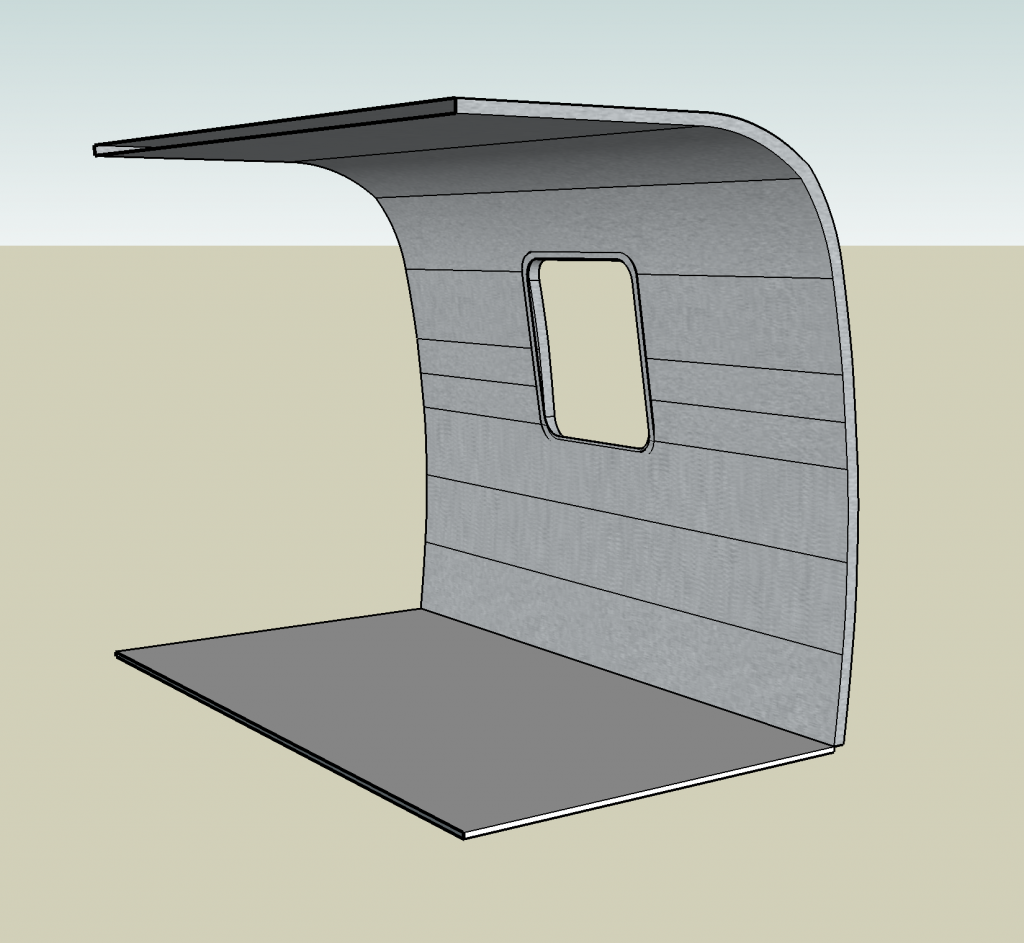
The ceiling is only 6 1/2′ high, so there isn’t a lot of vertical space to fit two beds. I was able to fit about 25″ of headroom above each bunk, which is enough for our girls to sit up in bed right now (although probably won’t be in a few years).
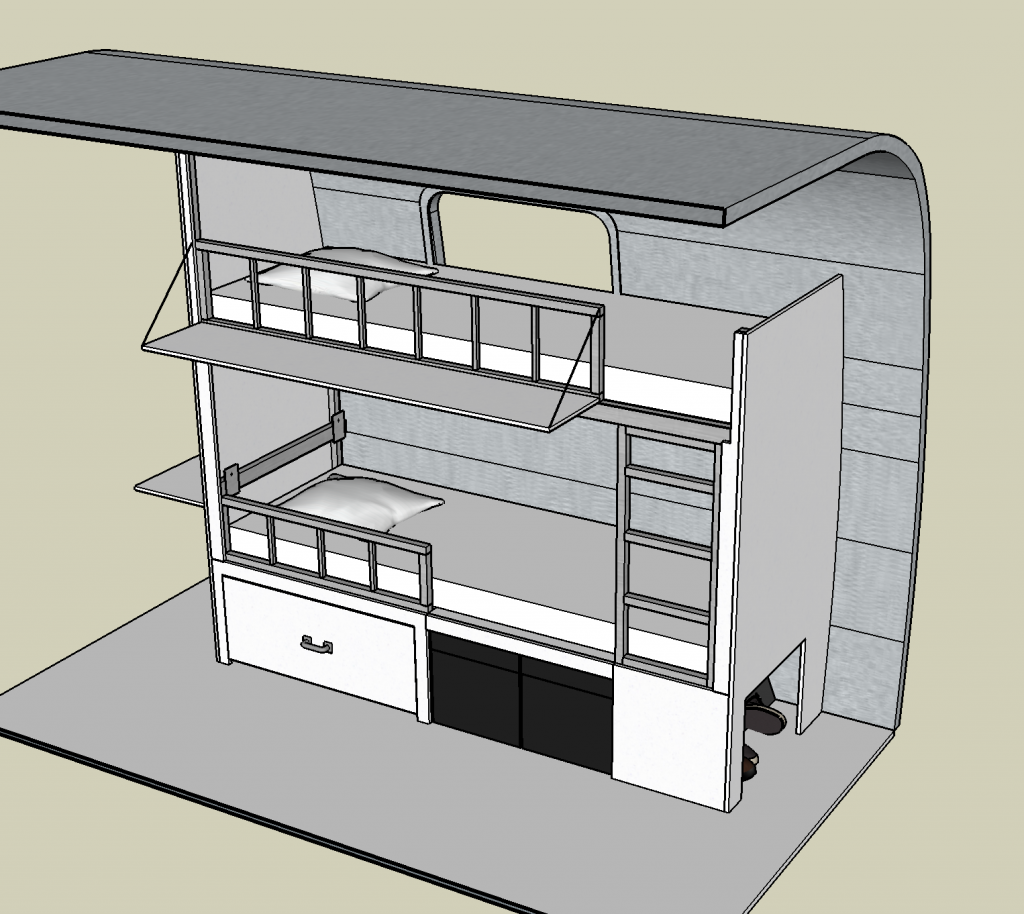
The bunks will each be 6′ 1 1/2″ long, so if needed an adult could just fit. The top bunk is 26″ wide and the bottom bunk is 28″ wide. We did some tests by lying down on the floor and placing bins next to us 26″ apart to see how it would feel and while it’s not super spacious it works for both kids and adults. Keeping the beds as narrow as possible was important in our design to maximize hallway space.
For storage, the design includes a shoe cubby on the side next to the entrance door, a large (28″ x 26″ x 12″) drawer, and a cubby where two IKEA storage boxes can just fit. This drawer will serve as our main food storage area, which will be a big improvement over the current storage under the dinette that is hard to access.
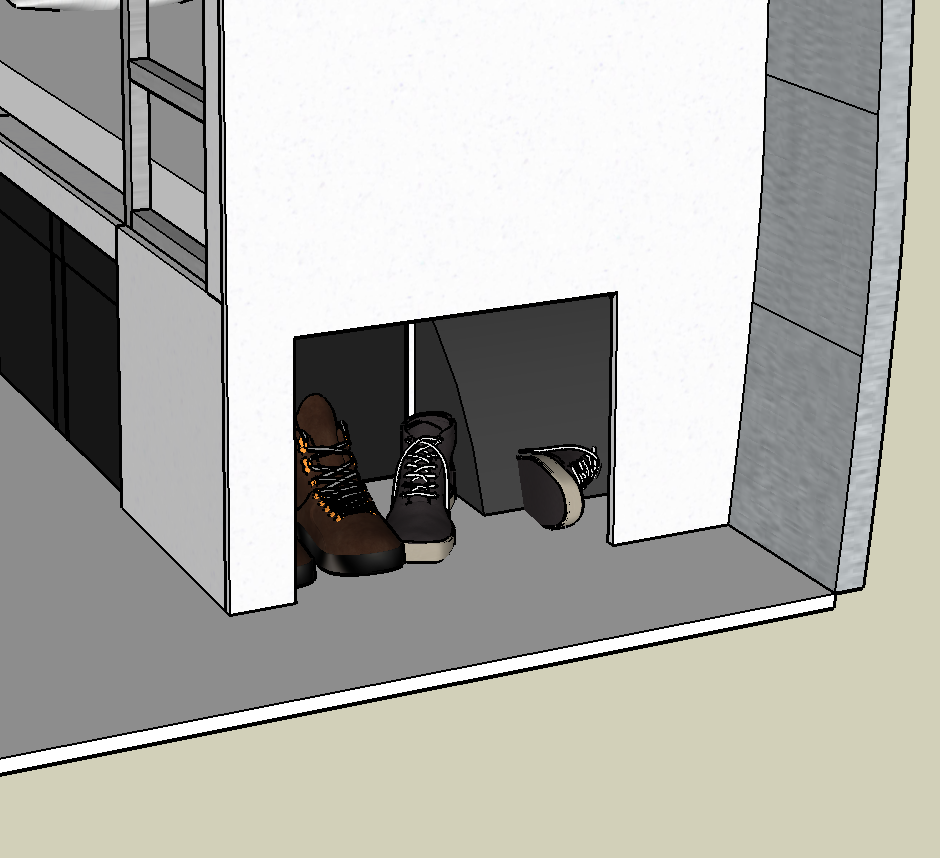
Shoe cubby 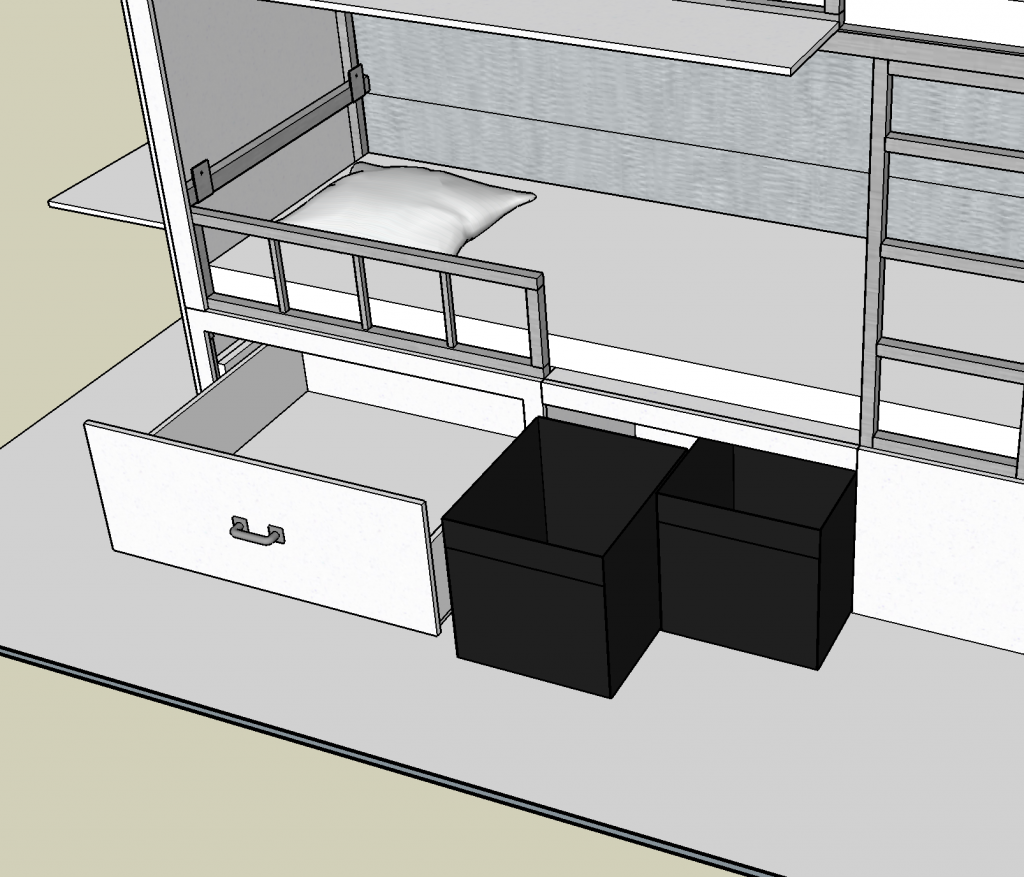
Drawer and IKEA boxes under bed
Although we won’t have a main dining table anymore, we incorporated a few table options into the bunk bed. First, there’s a slide out kids table. At only 15.5″ high our kids will outgrow it in the next few years, but making it any higher would have taken away precious headroom from the bunk beds.
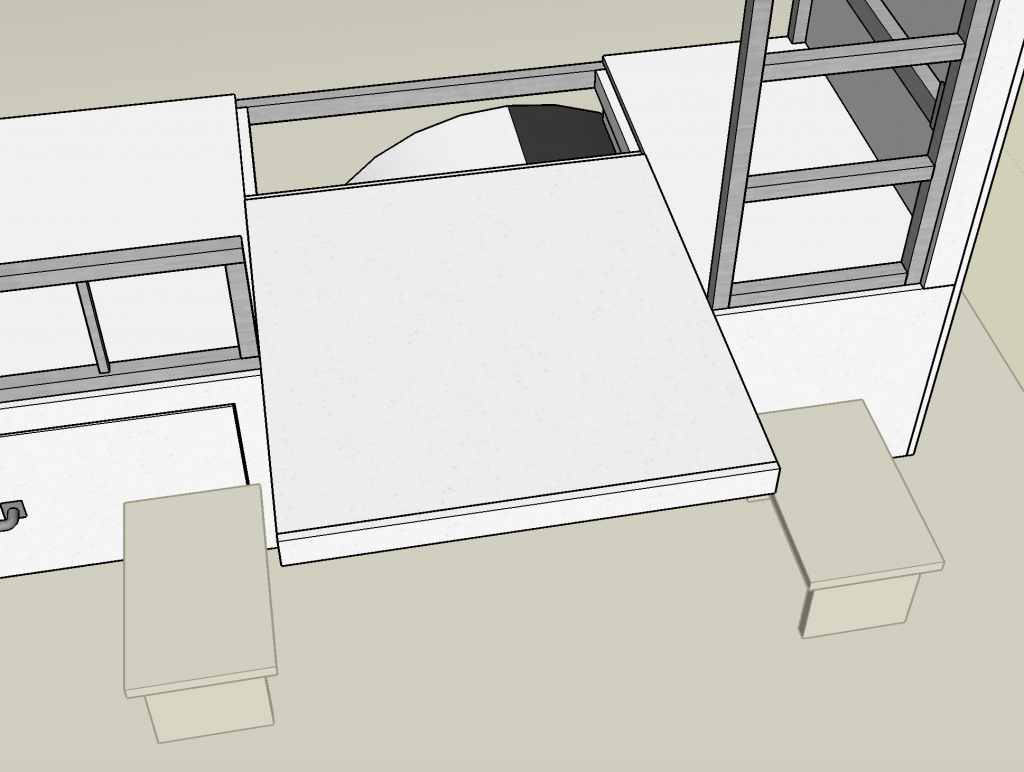
Middle section of lower bed platform slides out… 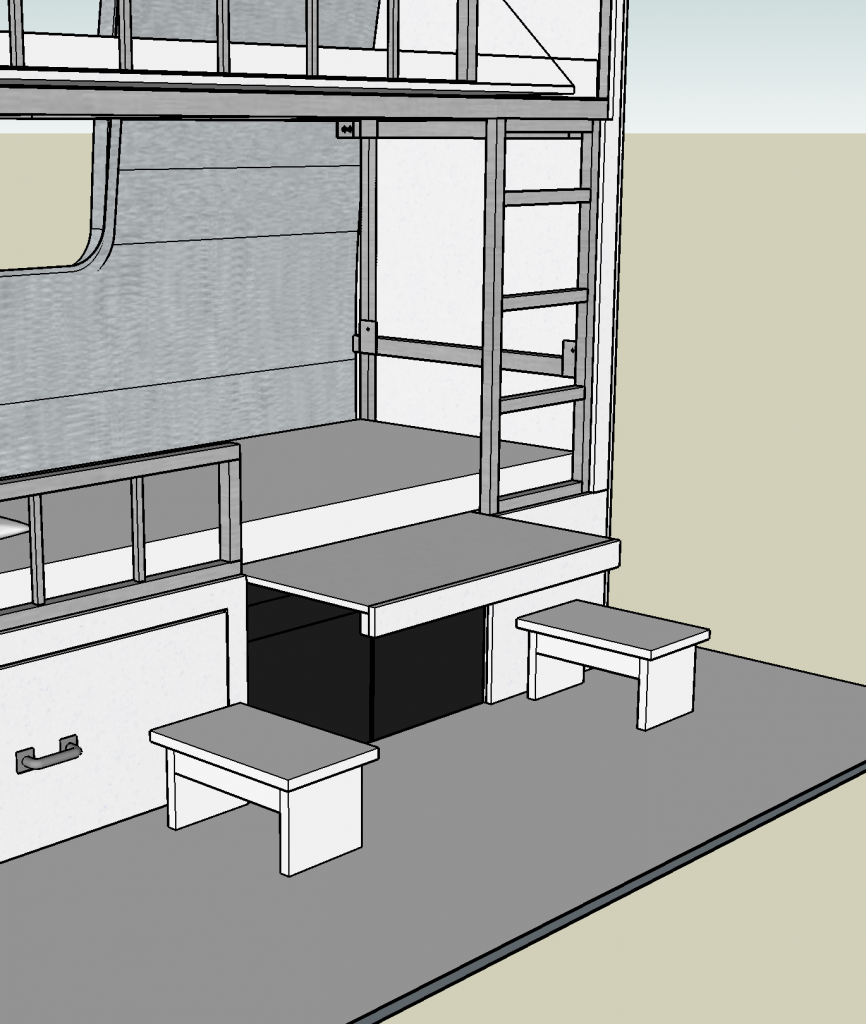
.. forming a kids table
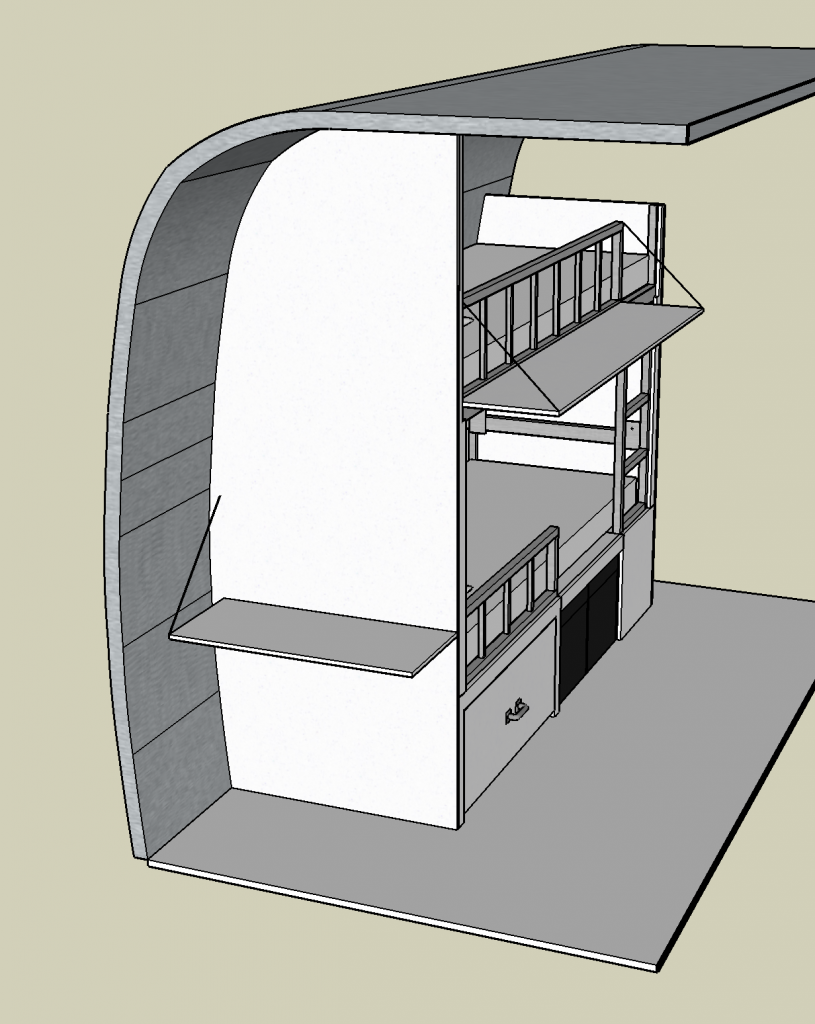
In addition to the kids table, there are two flip-down tables in the design. One flips down over the main bed, allowing someone to sit on the edge of the bed and eat at the table. The other flips down into the hallway and could serve as a stand-up eating table for adults, or additional prep-space in the kitchen.
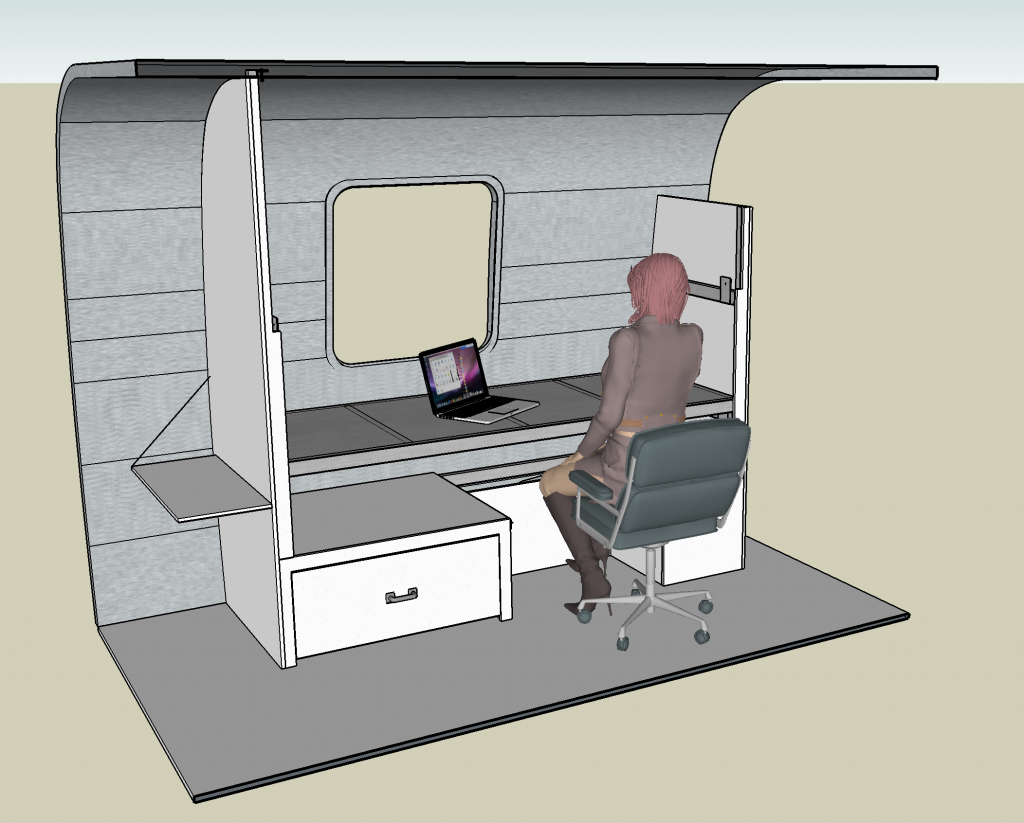
The last feature is “desk mode”. Although we’re unlikely to use this when we’re traveling, as it would require a fair bit of effort to convert from bed mode, this feature was included for when we’re at home and the Airstream is parked in our driveway. When we’re at home we usually keep the dinette set up as a table and I use it as an office. It’s nice to have a space outside of the main house to have a phone call where there isn’t the chatter of kids in the background.
Structure
Our Airstream only has 1 axle, so it can’t hold a lot of weight. It has about a 850lb payload capacity for our stuff, and I’m sure I’ve already reduced that by at-least 100lbs from our various upgrades (batteries, solar panels, etc). For this reason, it was important that the weight of this bunk bed remain as low as possible. Therefore, I knew it needed to be made mostly out of aluminum, not wood.
In the design, the top bunk, railings, ladder, and supporting structure is all made of aluminum.
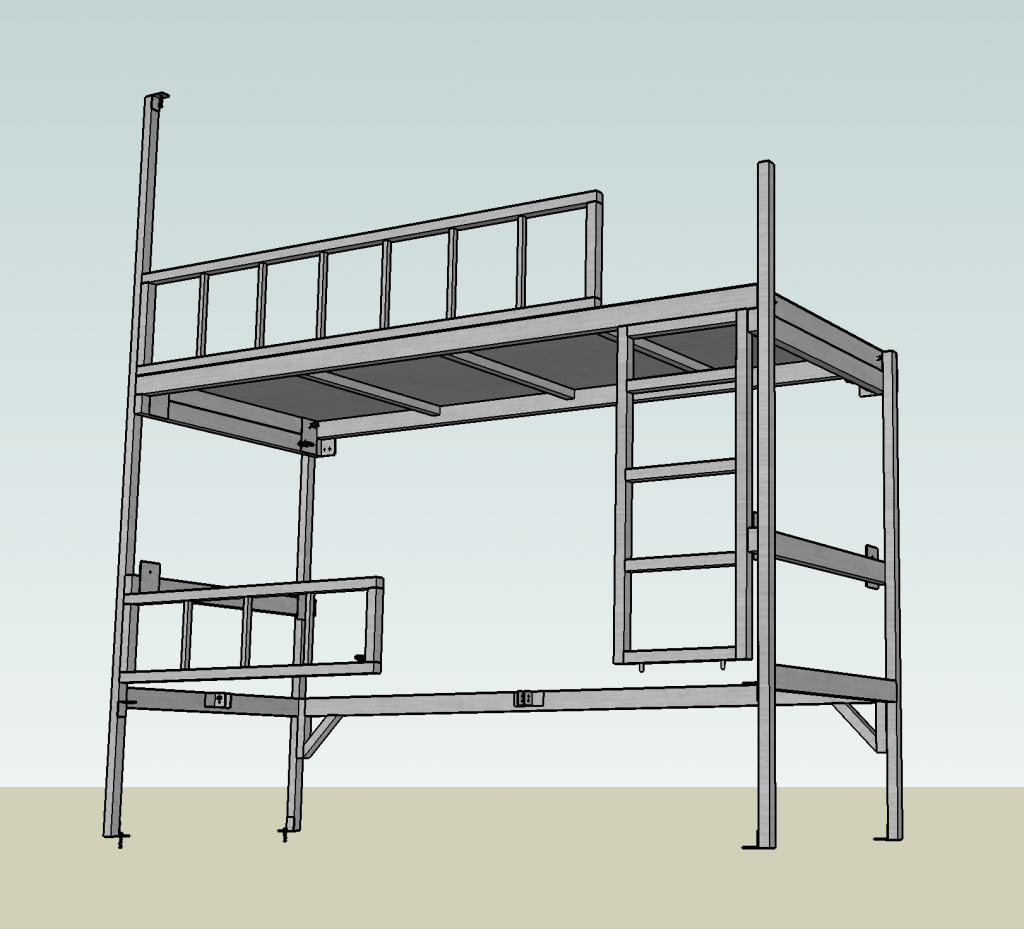
The lower bunk, since it can have floor supports near its middle, will be made with wood. This will both keep costs down and make it much easier to attach the plywood faces.
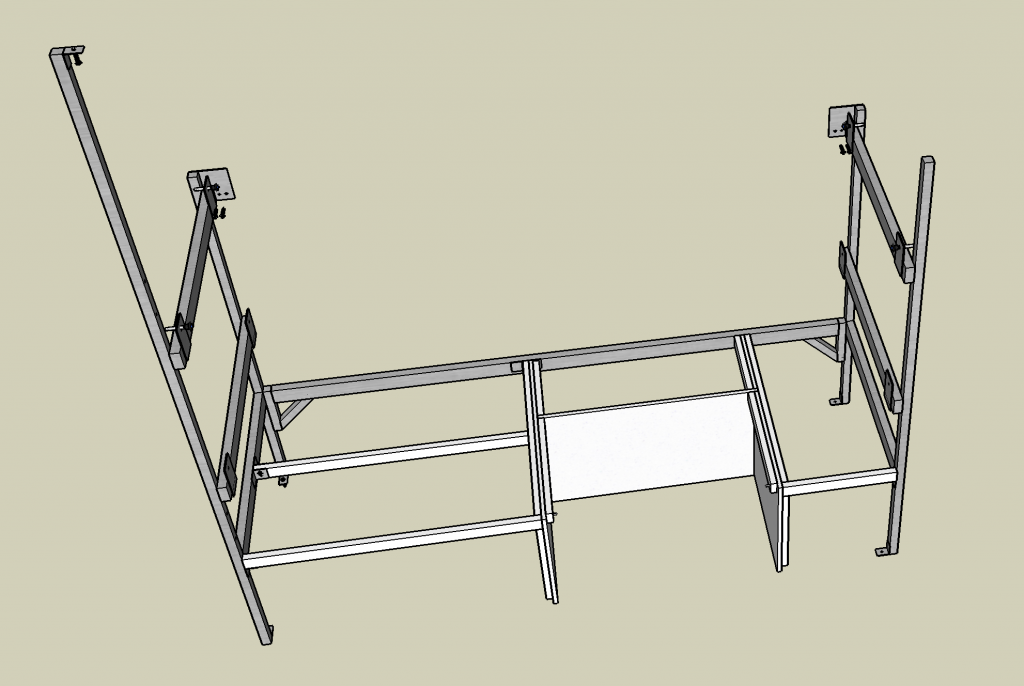
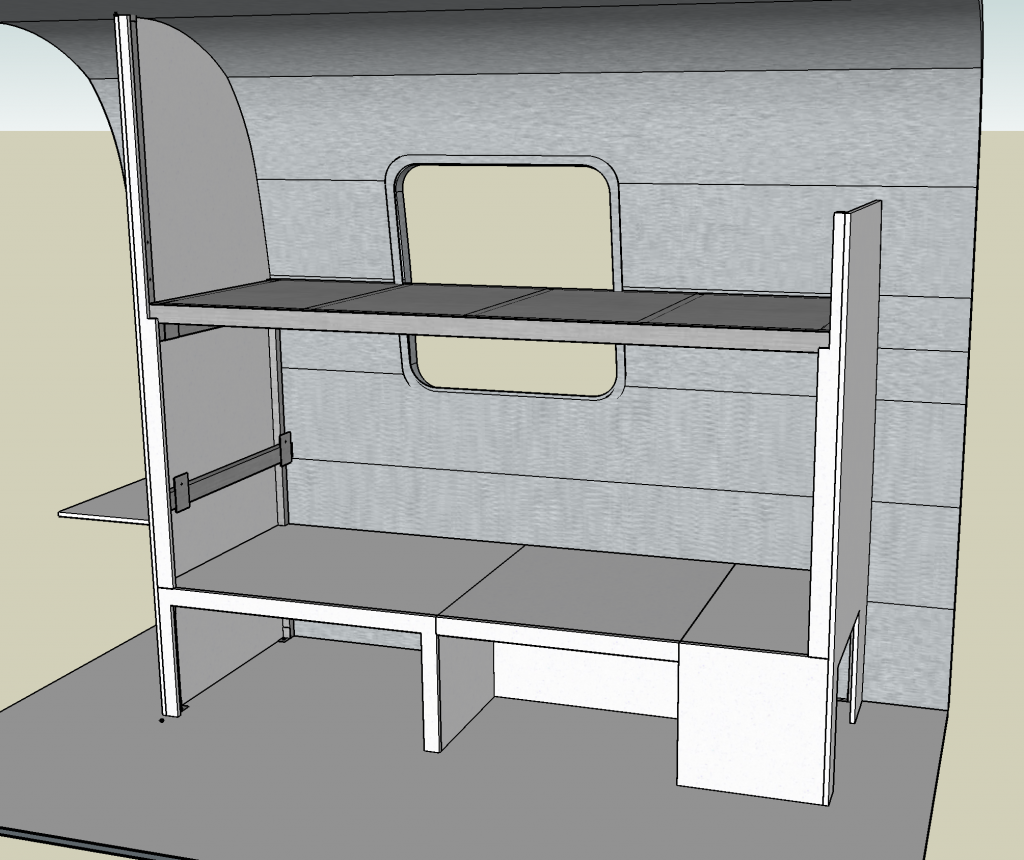
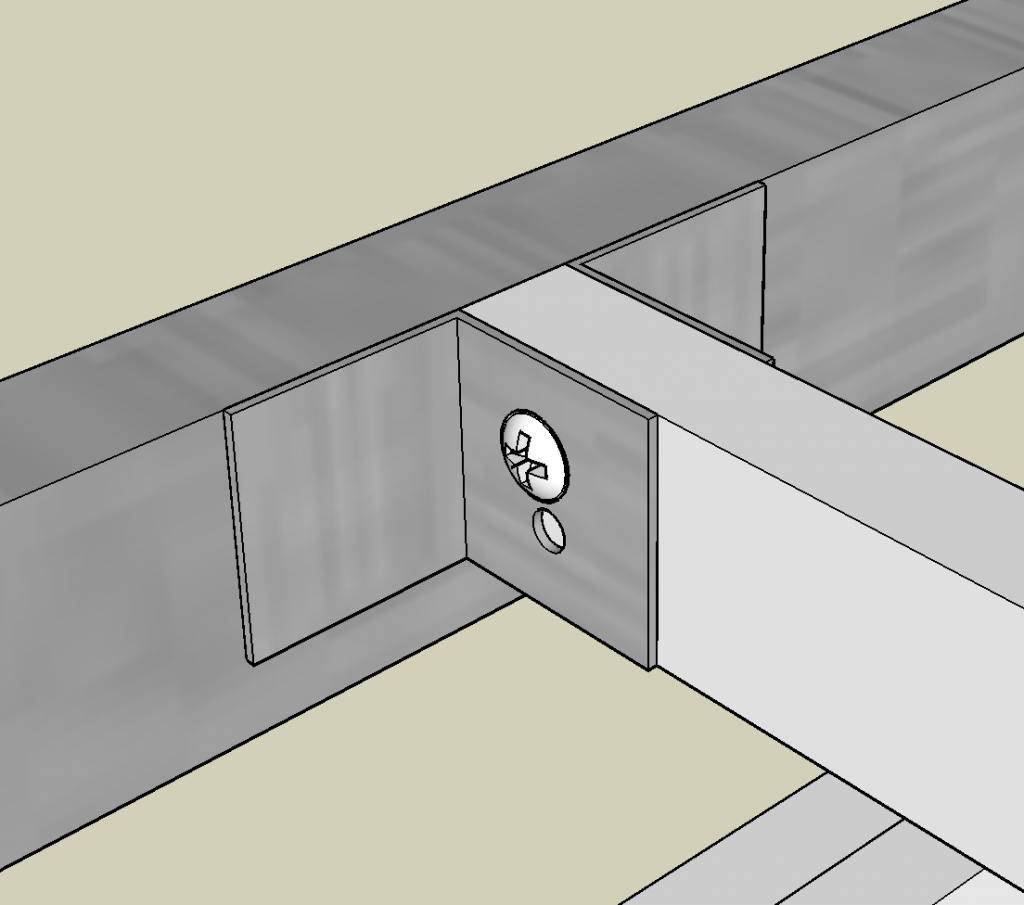
Where the wood and aluminum support structures meet I’ll weld on support brackets.
The bed will be attached to the Airstream shell in 7 places: 4 screws on the floor, 1 screw in the ceiling, and two attachment points against the wall.
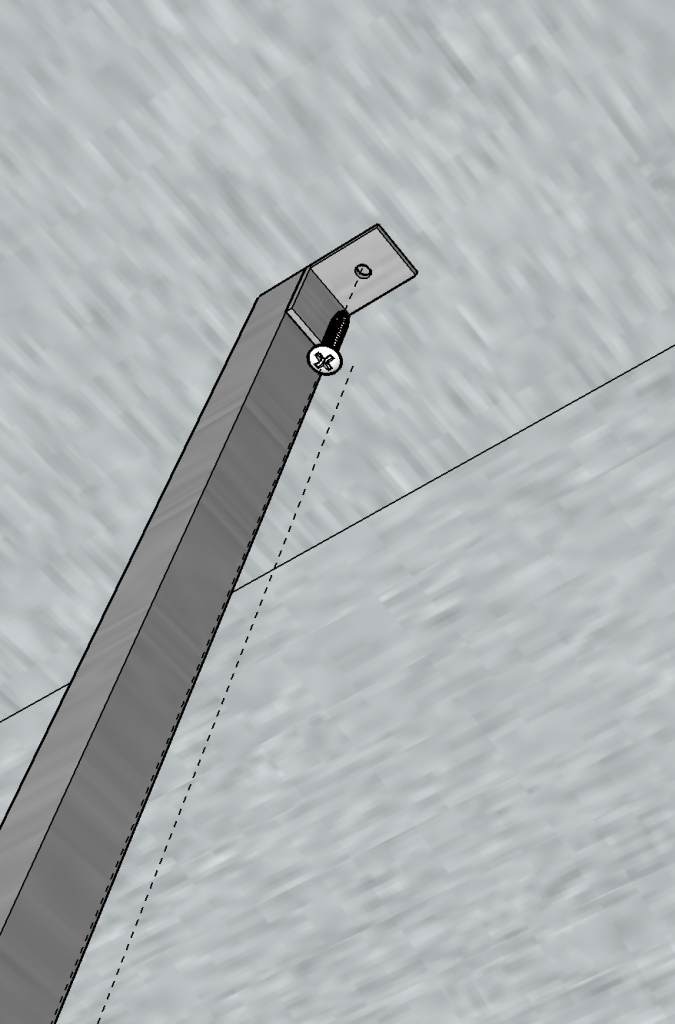
Ceiling support 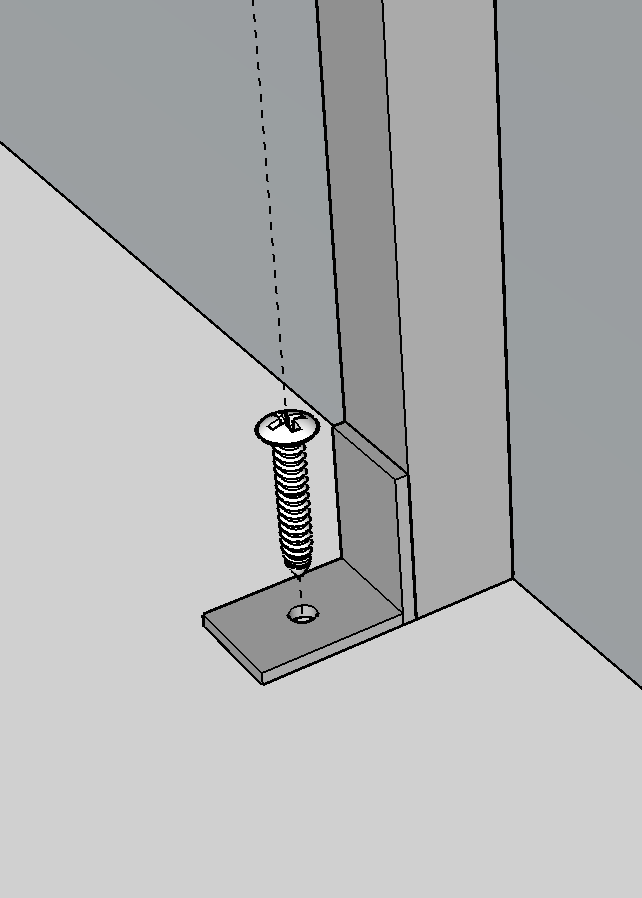
Floor screw 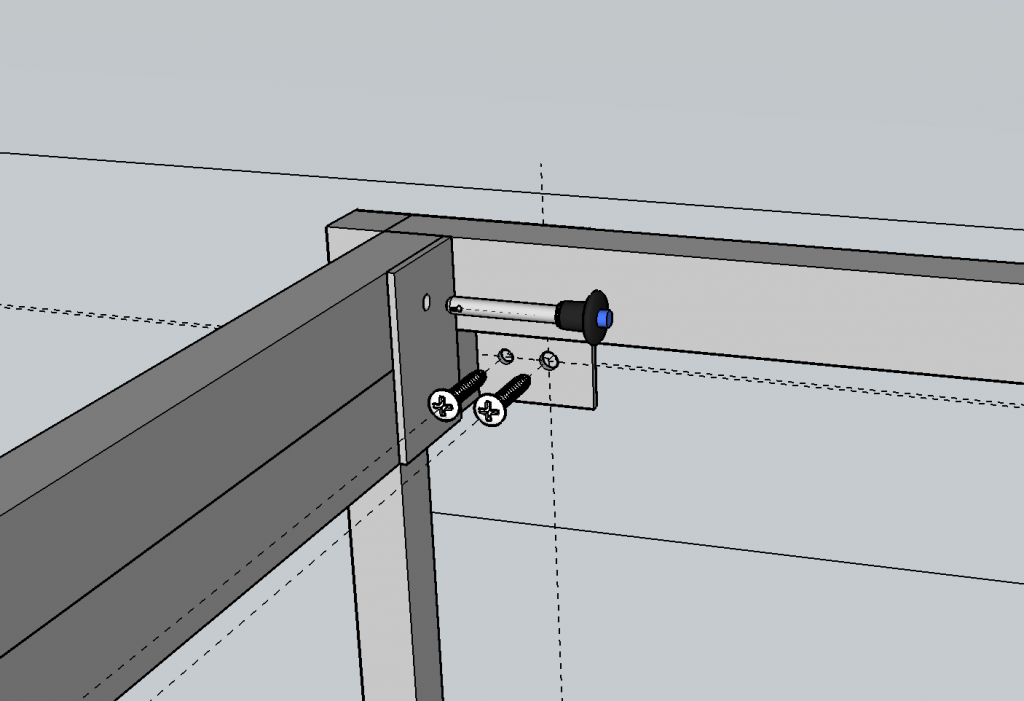
Wall attachment & quick release pin
The above picture also shows the quick release pins (of which there will be 4) that secure the top bunk in place. Removing these pins will allow the bunk to be dropped to the “desk-mode” level.
The ladder will be secured in place by 4 pins protruding from its top & bottom, which will be sandwiched in place between the bottom and top bunks.
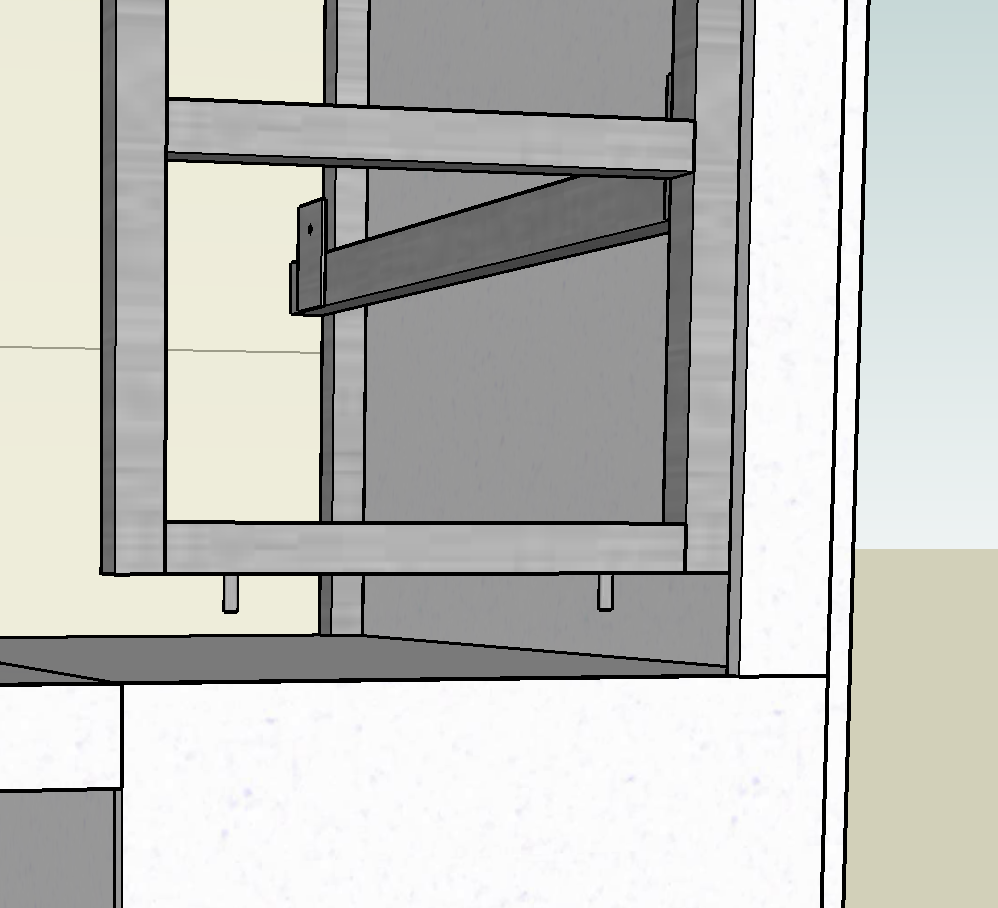
Ladder bottom pins 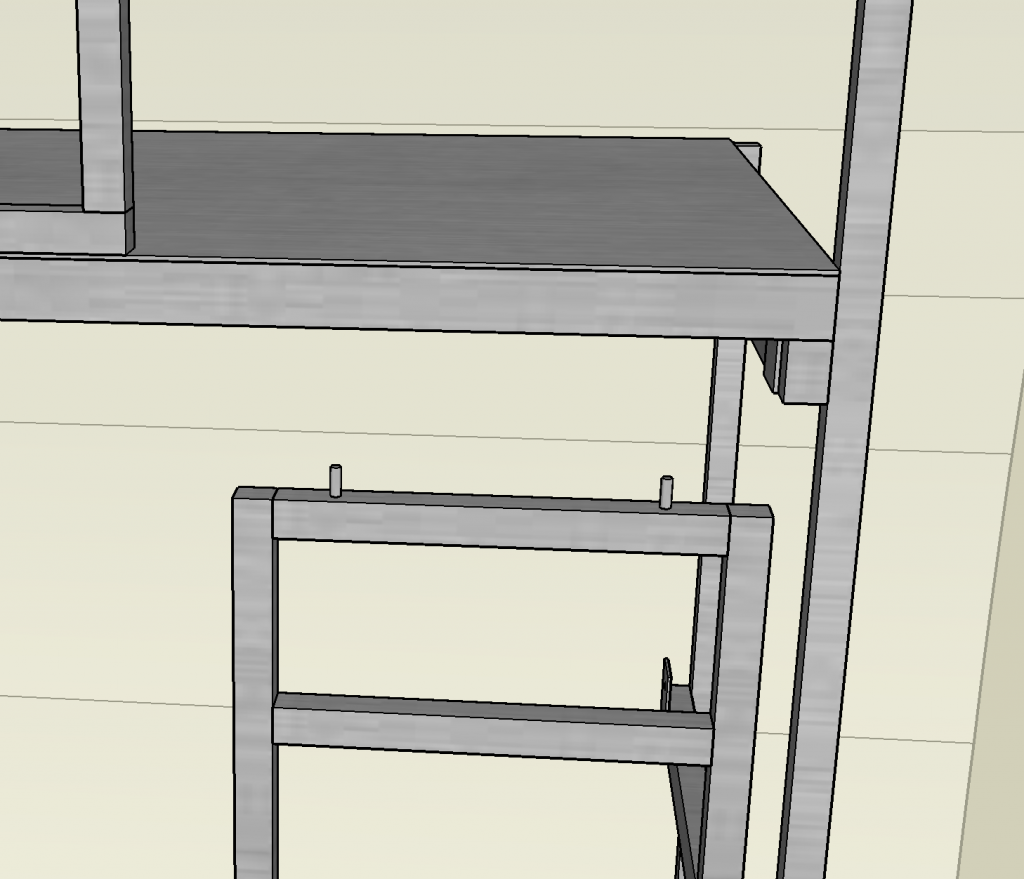
Ladder top pins
The guard rails will use a similar mechanism, with two pins on one side and a hand-turned bolt on the other side. This will allow the guard rails and ladder to be removed relatively quickly when converting to desk mode.

Well, this is all the plan anyways. Considering I’ve never worked with aluminum before, I’m sure I will have some surprises in store for me that may change this plan! 🙂
Getting the materials
Here in Portland there’s a place called “Metals Supermarket”. I had never been before, so I drove over and spent about an hour poking around their warehouse looking at the various types of materials they had. Until I could actually hold some chunks of aluminum I didn’t really have much of a concept of what 1/16″ or 1/8″ thick aluminum tubing felt like as far as weight and strength. It turns out that 1/8″ thick aluminum is pretty heavy duty, so I went with 1/16″ inch for this project, as it’s much lighter.
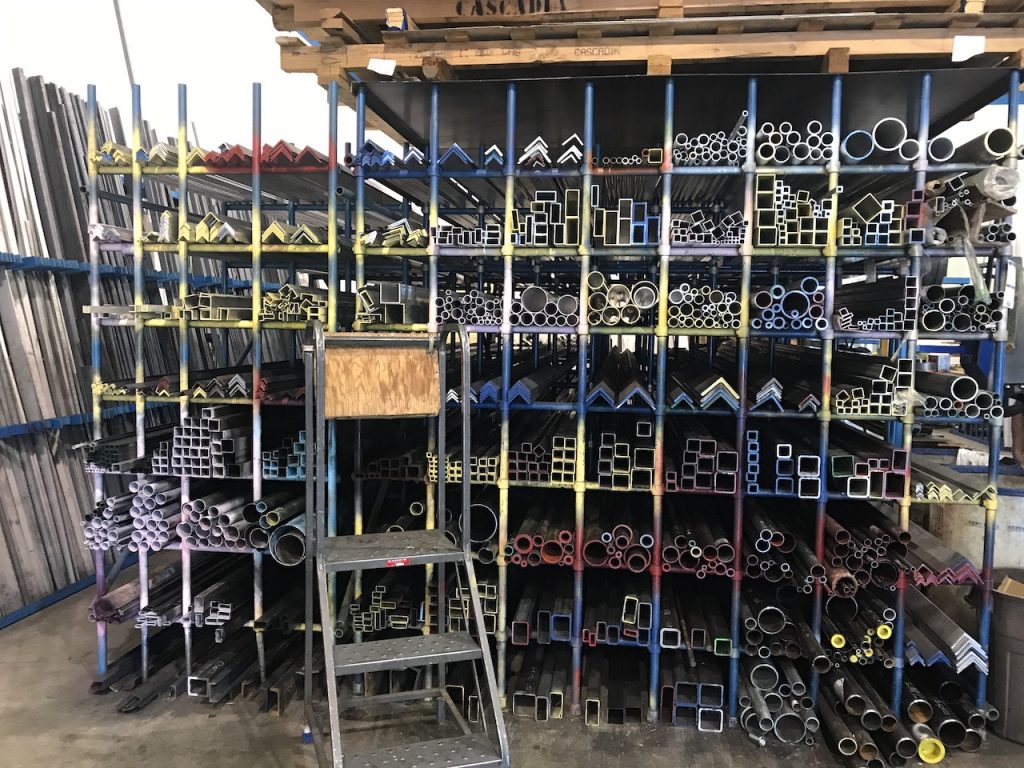
I used the Tube Calculator from Rogue Fabrication to determine the height needed of the long horizontal top-bunk supports to ensure that an adult sitting on the middle of the bed wouldn’t cause it to bend or sag excessively.
I went with 1″ x 2″ tubing 1/16″ thick of 6063 aluminum for these 6′ long supports, which makes it capable of holding 200 lbs right on the middle front edge of the bed (and more if the weight is distributed better). It would have been twice as strong with 6061 aluminum, but it wasn’t available in the size I needed. Most of the rest of the aluminum structure will be made of 1″ x 1″ x 1/16″ thick 6061 aluminum.
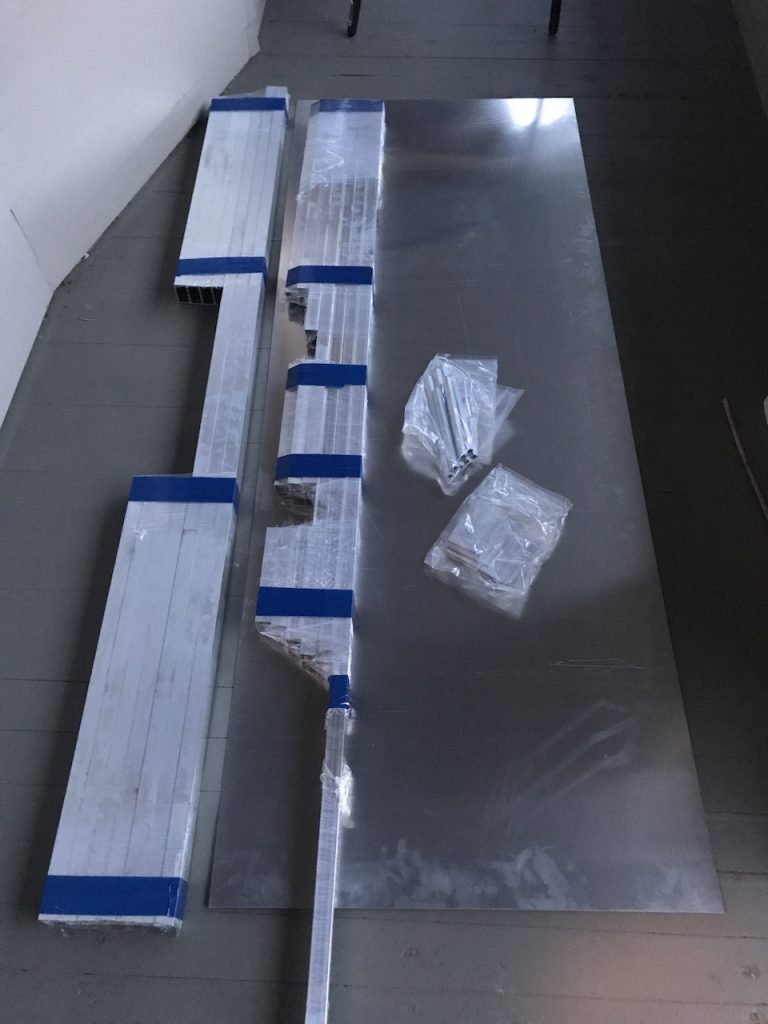
The Metals Supermarket was awesome! Not only were the prices better than anything I found online, but they also were willing to cut each piece for free. Rather than buying just the raw metal, I gave them my entire cut list for the project and over the course of a couple of days they prepped all my materials for me!
Next Steps
There are a few skills I need to learn before I can complete this project. The biggest: I’ve never welded before! Fortunately, my good friend Josh (who also helped with the lift-kit install) has a welder and is willing to teach me.
Beyond the welding, I’ve also never worked with laminates before. I want to make the plywood faces on the bed match the existing cabinetry in the Airstream, which means using the same laminate.
Lastly, the plywood at the head and foot of the beds will need to be scribed to match the curvature of the Airstream shell, and that’s something else I’ve never done before.
You can read part I, III and IV of this series of posts here:


Wow. This is a neat project! I love learning new skills, and could see myself doing something similar in early retirement. My pops is learning how to weld aluminum, and I’ll warn you that it is an art. It’s super easy to burn through, so make sure that you are practicing on scrap first. Good luck!
Hi Eric. Yea, I’m super excited to learn to weld aluminum but also nervous that it might not be a quick skill to pick up. I also heard that it’s easy to burn through the aluminum, and since I’m using 1/16″ thin aluminum I’m guessing that’s especially going the be the case. I’ll know in a couple of hours– we’re getting set up now :). I do have some extra material to practice with.
Hey Justin! That looks like a great project — if you need any help with the (non-welding) metal work, let me know. I’d be happy to help machine any odd-ball parts you might end up needing.
I’m also curious to hear how the welding goes; someday I want to get a welder, and it seems like aluminum welding requires a substantially different machine than working with ferrous metals (at least for Tig; I’m still stumbling through things when it comes to welding).
If you do more modeling like this, I’d suggest trying Fusion360. It’s a bit better suited to doing precision design than sketchup, and it can (more trivially) export to common formats (such as gcode, if you do any 3d printing, or send out for parts). It’s also free for this sort of thing.
Thanks Rogan, I’ll check out Fusion360. I hadn’t even looked at Autodesk products because I assumed they’d be super expensive– pretty cool that they offer Fusion360 free to hobbyists and startups. I’m nervous about the welding part, especially since I’ve already invested over $300 in the materials so I need to find a way to make it work one way or another :).